If you’re planning on re-flooring a kitchen or bathroom, a tile stripper is an excellent tool to have on hand. Rather than removing tiles one by one with a hammer and chisel, a tile stripper uses a vibrating blade to lift large areas of tile quickly and easily. As with any power tool however, a tile stripper warrants a bit of preparation.
Safety Precautions
The vibrating action of metal against tile is going to be loud, so it’s a good idea to wear hearing protection whenever you’re using a tile stripper. Tile stripping can also generate a fair amount of dust from the broken ceramic and mortar, so we recommend wearing a dust mask as well. Some tile strippers are gas powered, but you should never use them indoors. For inside work, always choose an electric tile stripper.
Putting the Tile Stripper to Work
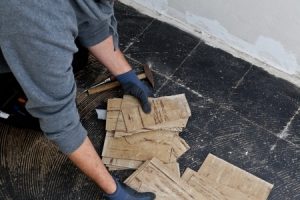
Now that you’ve got your hearing protectors and dust mask in order, it’s time to go to work. First, you’ll want to establish a flat edge on the tile to start from. In some cases, you might just have to remove a trim piece from the outer perimeter of the room to expose an edge. In others, you might have to create an edge by breaking a tile with a hammer and chisel. Ideally, this should be adjacent to one of the outer walls of the room.
Place the blade of the tile stripper against your exposed edge, turn it on, and slowly push the blade forward as it scoops tiles off of the floor. Move forward until you reach the back wall of the room. Once you’ve cleared your first row of tile, clear away the debris and move back to your original starting point. Simply move the tile stripper to the left or right and repeat the process on the next row of tiles. In essence, the process is similar to mowing a lawn.
Take your time, and before you know it your floor will be ready for a fresh set of tile.
Leave a Reply